
Picture this: a fourteen-year-old in Chennai sits at a kitchen table on a Saturday afternoon, an Arduino board in one hand and a printed wiring diagram in the other. By Sunday evening, a small wheeled robot is rolling across the floor, stopping just before it bumps into the refrigerator.
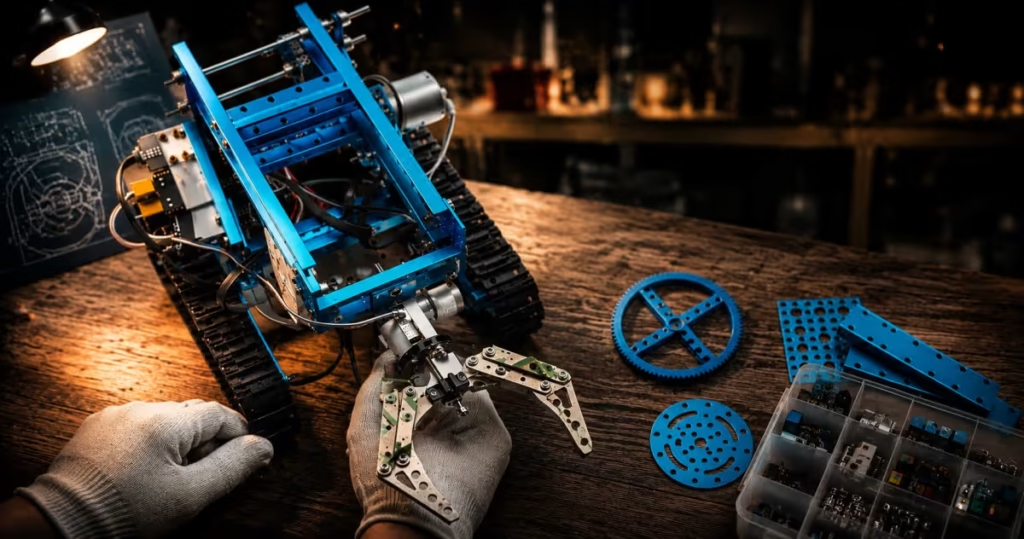
That’s not a prodigy story. That’s just what’s possible now, with around $60 worth of parts and a free IDE downloaded from the internet.
Building a robot used to require a university lab, specialized components that took weeks to ship, and at least one mentor who actually knew what they were doing. That’s not really true anymore.
The global robotics industry has crossed 4.66 million industrial robots in active operation, and behind that number is a generation of builders who started exactly where you’re starting right now: curious, slightly intimidated, and wondering where to even begin.
This guide walks you through everything. What you need, what it costs, how to build it step by step, how to program it, which kits are worth buying, and what to build first. No engineering degree required. Seriously.
What Do You Need to Build a Robot?
Here’s the good news: a robot, at its core, is just five things working together. Doesn’t matter if it’s a $2 million surgical system or a $50 beginner car kit; the same five building blocks are always there. Understanding what each one does makes every other step in this guide click into place faster.
| Component | What it does | Common example |
|---|---|---|
| Microcontroller | The brain runs your code and controls everything else | Arduino Uno, Raspberry Pi |
| Sensors | The senses detect the world around the robot | Ultrasonic sensor, infrared sensor, camera |
| Actuators / Motors | The muscles create physical movement | DC motor, servo motor |
| Chassis | The body holds all the parts together | Acrylic frame, cardboard, 3D-printed shell |
| Power supply | The heart keeps everything running | Li-ion battery pack, AA batteries |
If you want a deeper explanation of how each of these components works inside a real robot, what sensors actually detect, and how actuators create movement, our beginner’s guide to how robots work covers the full breakdown. That’s genuinely it for a first build.
One thing worth saying upfront: you probably already own some of this. A USB cable, a phone charger, and a battery pack all have legitimate roles in a beginner robot build. The barrier is lower than it looks from the outside.
How Much Does It Cost to Build a Robot?
Honestly, this depends almost entirely on what you want the robot to do and how much of the component-hunting you’re willing to do yourself. There are three realistic tiers for a beginner.
The entry-level DIY route runs roughly $20–$50. At this level, you’re sourcing individual components: an Arduino clone from AliExpress, two DC motors, a small ultrasonic sensor, some jumper wires, and a cardboard or plywood chassis you cut yourself.
The result is a simple obstacle-avoiding robot that works, teaches you a lot, and costs less than a decent meal out. The tradeoff is time spent sourcing parts and a higher chance of small compatibility headaches.
The mid-range kit route sits between $65 and $150, and this is where most beginners find the best balance. Kits like the Elegoo Smart Robot Car V4 ($75.99 from Elegoo’s official store) come with every component pre-selected, a detailed assembly guide, and code that’s ready to upload the moment everything is wired up.
You spend your time building and learning, not troubleshooting why components from three different suppliers won’t talk to each other.
The advanced DIY build custom chassis, Raspberry Pi with camera vision, multiple sensor types, and 3D-printed parts can run anywhere from $150 to $500 or more, depending on scope. This tier produces genuinely capable robots, but it’s better suited as a second or third build, once you already understand how the fundamental pieces fit together.
How to Build a Robot Step by Step
Let’s get into the actual building. This is the part most guides rush through with vague half-instructions, which is frustrating when you’re sitting in front of a pile of components wondering what to do next. So here’s the full process, one step at a time, with enough detail to actually be useful.
Step 1: Decide what your robot will do.
This sounds obvious, but it’s the step most beginners skip and then regret. Purpose shapes everything downstream: what sensors you need, what motors, how complex the code will be, how big the chassis should be.
If you’re drawn to autonomous navigation, specifically robots that find their own path through an environment, it’s worth seeing how the same principles apply at scale in autonomous mobile robots working in agriculture, where AMRs navigate entire fields without human guidance.
Pick one specific thing your robot will do before you buy a single component. It’ll save you money and a lot of head-scratching later.
Step 2: Choose your microcontroller.
Two names come up constantly for beginners, and for good reason. The Arduino Uno is the go-to starting point; its programming environment is simple, its community is enormous, and if something goes wrong, someone on the Arduino forums has almost certainly already solved the same problem. It runs a simplified version of C++ and costs around $25–$30 for the official board.
The Raspberry Pi is more powerful; it’s essentially a mini-computer running Linux, with better support for camera vision, AI processing, and complex software. But it has a steeper learning curve. The rule of thumb is straightforward: start with Arduino unless you specifically need a camera or AI capability from day one.
Step 3: Source your components.
Once you know your purpose and microcontroller, the component list follows naturally. For a beginner obstacle-avoider: two DC motors, an ultrasonic sensor, a motor driver board (the L298N is a common, cheap, reliable choice), jumper wires, a breadboard, a battery holder, and a chassis.
For individual components, AliExpress and Amazon both work well. If you’d rather not hunt down parts individually for a first build, this is a completely reasonable call; a kit like the Elegoo Smart Robot Car V4 ($75.99) comes with everything pre-matched and a step-by-step assembly guide.
Step 4: Assemble the chassis.
The chassis is the physical body that holds everything together. If you’re using a kit, it’ll be a pre-cut acrylic frame with mounting holes already drilled.
If you’re building from scratch, cardboard is a completely legitimate material for a first robot; it’s light, easy to cut, easy to modify when you inevitably need to reposition something, and costs essentially nothing. Bolt your motors to the chassis first, attach the wheels, and make sure everything sits level before adding electronics on top.
Step 5: Wire everything up.
Connect your sensors, motors, and motor driver to the microcontroller using jumper wires and your breadboard. The breadboard lets you make all these connections without soldering wires; push them into holes, and they hold themselves in place.
Do this before gluing or screwing anything down permanently. Label your wires if you can, even just with a small piece of tape; it sounds pedantic until you’re staring at twelve identical black wires trying to figure out which one goes where.
Step 6: Install your software and write the code.
Download Arduino IDE 2 from Arduino.cc it’s free and takes about five minutes to install on Windows, macOS, or Linux. Connect your Arduino to your computer via USB.
The IDE has two main functions you need to understand: setup(), which runs once when the robot powers on (this is where you tell the code what each pin does), and loop(), which runs continuously in a cycle (this is where the actual robot behavior lives).
Your first program should be as simple as possible: make the robot move forward for two seconds, stop, repeat. Get that working before adding sensors or logic.
Step 7: Test, break things, and fix them.
Here’s the truth: your first build won’t work perfectly on the first try. One wheel will spin faster than the other. A sensor will give strange readings. The robot will veer left when it should go straight.
This isn’t failure; it’s the most educational part of the whole process. Every fix teaches you something about how the system actually works that no guide could explain in advance. Normalize iteration. Every roboticist you’ve ever admired spent time debugging something embarrassingly simple on their first build.
Step 8: Mount everything permanently.
Only once testing confirms that everything works, do you fix components to the chassis for keeps. Hot glue works well for beginners; it holds firmly, peels off if you need to reposition something, and requires no drilling or special tools. Cable ties keep wires tidy and prevent them from snagging on wheels mid-run.
How to Program a Robot
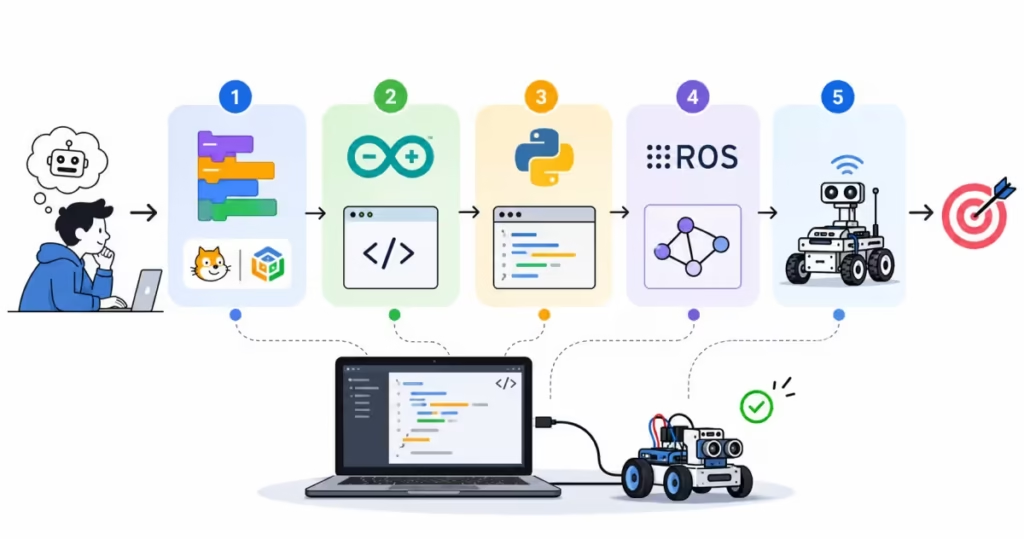
Programming is the part that makes most beginners nervous. It shouldn’t be, and here’s why: the first program you write for a robot will probably be about twenty lines long.
That’s it. You’re not writing operating systems. You’re telling a small machine to spin two motors when a sensor sees an obstacle. The logic is simple; the syntax just takes a little getting used to.
If you’ve never written a single line of code, start with Scratch or Blockly. These are drag-and-drop visual programming environments where you snap colored blocks together instead of typing syntax. Scratch is free, browser-based, and was originally built by MIT. Blockly is Google’s equivalent.
Neither requires any setup. Both teach the core logic of programming sequences, loops, and conditions without the frustration of semicolons and bracket errors derailing your first session. Several beginner robot kits, including LEGO SPIKE Prime and some SunFounder models, support Blockly natively.
If you’re comfortable with basic logic and want to go further, Arduino’s C-based language is the natural next step. It’s a simplified version of C++ clean enough that a complete beginner can write functional robot code within a weekend, powerful enough that professional engineers use it in production projects.
Arduino IDE 2 (the current version, 2.3.9 as of mid-2026) is free, open-source, and includes autocomplete, a built-in debugger, and thousands of example sketches you can load, run, and modify immediately.
The same Python-controlled sensor systems powering your Raspberry Pi robot are what drive precision agricultural robotics at a commercial scale. If that direction interests you, it’s a natural rabbit hole to follow.
Speaking of ROS, it’s worth knowing it exists, even if it’s not where beginners start. The Robot Operating System is the professional standard framework used in research labs, autonomous vehicles, and commercial robots worldwide.
It handles the complex coordination between a robot’s sensors, processing, and actuators in a structured, modular way. It’s not beginner territory, but it’s a natural step for anyone who gets serious about the field.
As Demis Hassabis, CEO of Google DeepMind, has observed: “The ability to write code is increasingly the ability to think precisely.” Robotics programming, more than almost any other application, forces exactly that kind of precision because when your logic is wrong, the robot tells you immediately, in the most literal way possible.
Best Robot Kits for Beginners
You know what nobody tells you when you start looking for a beginner robot kit? Every kit company on the internet will tell you their kit is the best one for beginners. So instead of taking anyone’s word for it, here’s an honest, product-neutral breakdown of the kits that consistently show up in beginner robotics communities for the right reasons, not just because they’re well-marketed.
| Kit | Best for | What’s included | Price range |
|---|---|---|---|
| Elegoo Smart Robot Car V4 | Pure beginners, Arduino-based | Chassis, motors, ultrasonic sensor, line tracking, infrared remote, Arduino clone, camera, full tutorial | ~$75.99 |
| SunFounder PiCar-X | Raspberry Pi learners, AI/vision projects | Full car kit, 2-axis camera, ultrasonic sensor, Python + Scratch support (Raspberry Pi not included) | ~$90–$120 |
| Arduino Official Starter Kit | Learning electronics fundamentals first | Arduino Uno, breadboard, components, 15 guided projects, project book | ~$65–$75 |
| Petoi Bittle X | Intermediate builders, quadruped movement | Robot dog kit, servo motors, open-source code, Python/Arduino support | ~$220–$320 |
| LEGO SPIKE Prime | School use, ages 10–16 | LEGO bricks, programmable hub, motors, sensors, Python + Scratch support | ~$330 |
A few things worth saying plainly before you pick one. The Elegoo V4 is the best starting point for most adults and older teens who want to learn electronics and coding simultaneously. It’s comprehensive, cheap enough to not feel precious, and the community support is solid.
The SunFounder PiCar-X is a better choice if you already know you want to work with Python and eventually get into computer vision or AI, though you’ll need to buy a Raspberry Pi separately and factor that into your budget.
The Arduino Official Starter Kit is slightly different from the others; it’s less about building a specific robot and more about learning electronics fundamentals through fifteen guided projects. If the electronics side feels more intimidating than the building side, start here before moving to a car kit.
And the LEGO SPIKE Prime? It’s genuinely excellent, thoughtfully designed, school-curriculum-aligned, and an absolute joy to assemble for younger builders. But at $330, it’s a significant investment. If price is a constraint, the Elegoo gets you 80% of the learning experience at 23% of the cost.
The broader choice kit and DIY component sourcing comes down to one question: is your goal to learn robotics, or to learn component sourcing? Both are valid. Once you’ve built your first robot and want to see how these same components scale into real-world medical applications, robotics in healthcare shows how the leap from hobby kit to surgical system is smaller in principle than it looks.
Simple Robot Projects to Start With
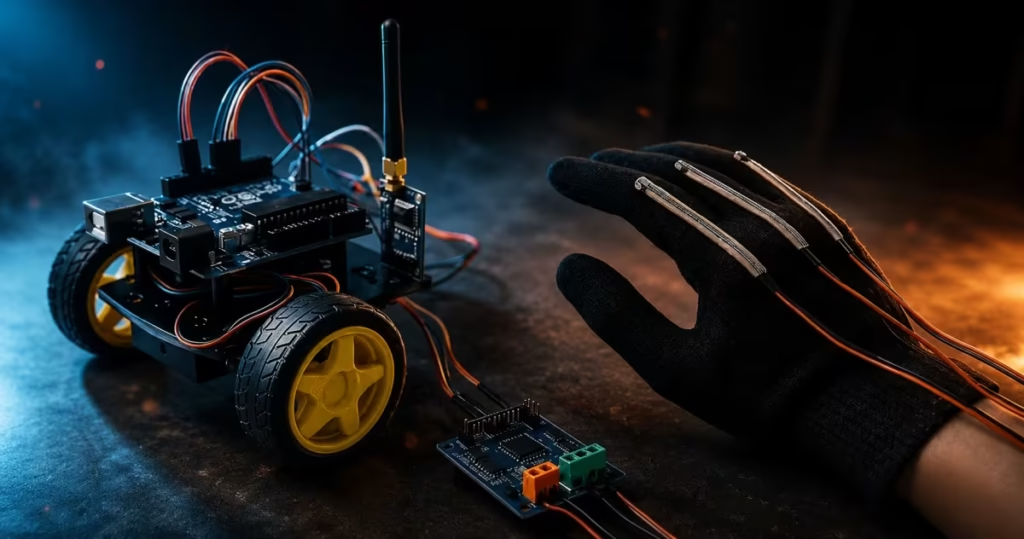
Here’s the truth about first robot projects: the goal isn’t to build something impressive. The goal is to build something that works, something that completes its loop of sense, decide, act, and proves to you that you actually understand what’s happening inside the machine. Impressive comes later. Working comes first.
The LED-blinking bot is the absolute floor: no motors, no movement, just a microcontroller, a few LEDs, and a simple program that makes them blink in a pattern.
It sounds anticlimactic. But it teaches you how to set up your IDE, write a program, upload it to a board, and see a physical result. That feedback loop, write code, see physical reaction, is something that clicks fast and never gets old.
The obstacle-avoiding robot is the classic first wheeled build, and for good reason. Two DC motors, one ultrasonic sensor, an Arduino, and some basic conditional logic: if the sensor detects something closer than 20 centimeters, reverse and turn. If not, go forward.
It’s a weekend project at the DIY level and an afternoon project with an Elegoo kit. That same obstacle-avoidance logic, detect, decide, reroute, is the foundation behind the types of robots used in modern farming, just operating at a much larger scale across open fields.
The remote-controlled car introduces wireless communication, Bluetooth or infrared, and is particularly motivating for younger builders because the result is something that feels immediately playable. Most Elegoo and SunFounder kits include this as one of their built-in modes, which is part of why they’re good starting kits.
The robotic arm is a good first non-wheeled project. Three or four servo motors, a basic frame, and some code controlling joint angles. No driving, no navigation, just controlled, precise movement. It’s visually impressive, it teaches servo control and positional programming, and it’s a satisfying next step after a wheeled bot.
Final Thoughts
Building a robot is one of those things that sounds intimidating right up until you actually do it, and then it feels obvious in retrospect. The components make sense once you hold them. The code makes sense once you see it move something. The whole process clicks into place faster than most beginners expect, because robots are ultimately just systems, and systems can be learned.
The tools available now, affordable kits, free IDEs, vast open-source communities, and freely available tutorials mean that the barrier between “curious about robotics” and “built my first robot” has never been lower. As Jensen Huang, CEO of NVIDIA, put it: “Software is eating the world, but robots are going to eat software.” The people building those robots started exactly where you are now.
Your first robot won’t be perfect. Build it anyway. For a deeper understanding of the broader field you’re stepping into, how robots work, the history behind them, and the industries they’re already reshaping, our beginner’s guide to robotics covers everything from the ground up.
1. Do I need to know how to code to build a robot?
Not from day one, no. Several beginner kits, including options that support Scratch and Blockly, come with preloaded programs you can run immediately without writing a single line of code. That said, basic coding skills will open up a lot more of what your robot can do, and the good news is that robotics programming is one of the most satisfying ways to learn. You see results physically, immediately. Most beginners pick up enough Arduino or Python to write simple robot programs within a week of consistent tinkering.
2. How long does it take to build a robot?
A basic wheeled robot using a kit typically takes one to two days, a few hours for assembly, a few more for wiring, and uploading your first program. DIY builds from individual components take longer, mainly because sourcing and troubleshooting compatibility issues add time. A more complex robot with camera vision, AI features, or a custom chassis can take weeks or months. The honest answer is: plan for longer than you think, and treat every extra hour as part of the learning rather than a setback.
3. Can I build a robot with household materials?
Yes, more than you’d think. Cardboard is a legitimate robot chassis material; it’s light, easy to cut, and forgiving when you need to reposition components. Old toothbrushes, rubber bands, bottle caps, and AA batteries have all been used in real working beginner robots. The electronics (sensors, microcontroller, motors) do need to be purchased, but the structural body of a first robot can absolutely be built from things already sitting around the house.
4. What age is appropriate to start building robots?
There’s no hard lower limit. LEGO SPIKE Essential is designed for ages six and up and involves real programming logic. LEGO SPIKE Prime works well from around ten onwards. Arduino-based builds are typically comfortable from twelve or thirteen, with some support. The more relevant question is interest level, not age. A motivated ten-year-old with a curious parent alongside them can absolutely work through an Elegoo kit. Adult beginners with zero prior experience also do just fine starting at the same entry points.
5. Is a special workspace or workshop needed?
Not at all. A kitchen table, a laptop, and decent lighting are genuinely all you need for a beginner robot build. No laser cutters, no drill press, no dedicated electronics bench. The only tool consideration worth mentioning is a soldering iron if you eventually move to permanent builds, but even then, a basic $20 iron on a stable surface works fine. The workshop comes later, if the hobby sticks.
6. Do I need to solder to build a robot?
For a first build, no. A breadboard and jumper wires handle all the connections you need without any soldering. Soldering becomes useful and eventually necessary for more permanent, compact builds, but it’s a second-step skill, not a starting requirement. If you’re using a beginner kit like the Elegoo Smart Robot Car, everything connects with plug-in wires straight out of the box.